Workday Walkthrough
Complete guide for Workday users to import and process their transaction data
Getting Your Files from E-Trade
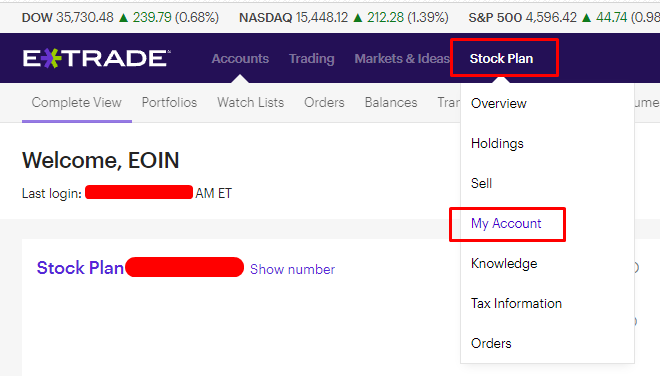
Access Your Account
Navigate to "Stock Plan > My Account" in your E-Trade interface.
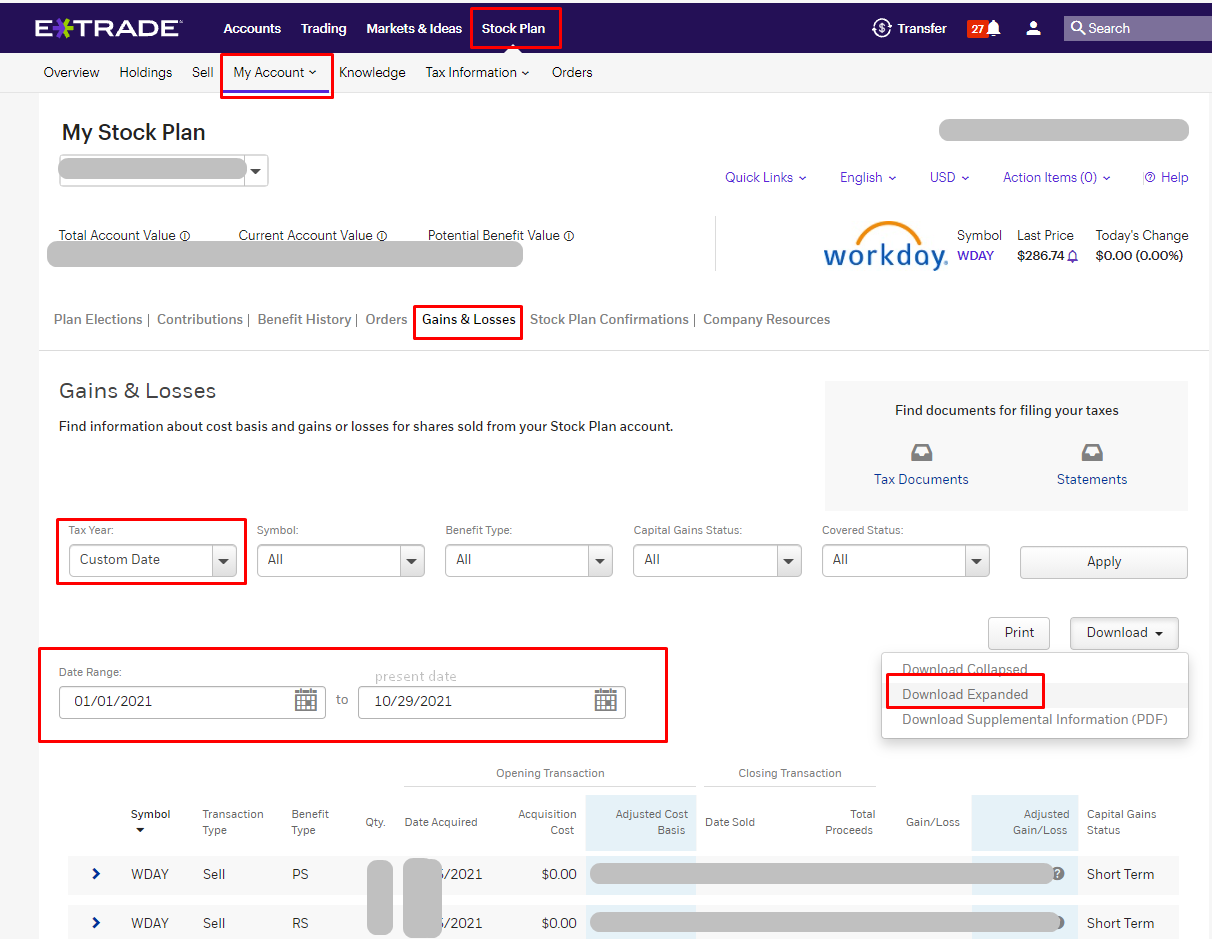
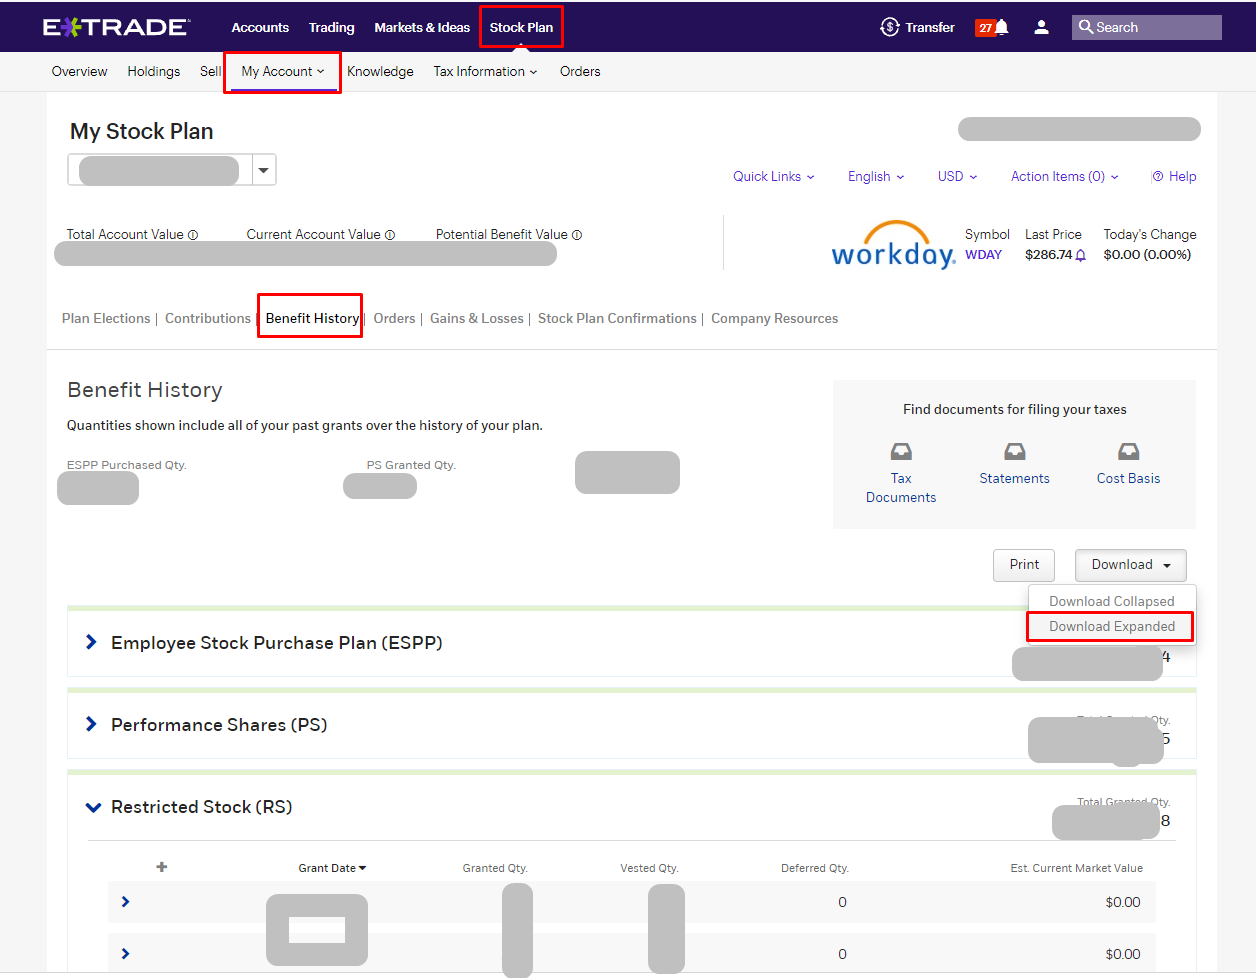
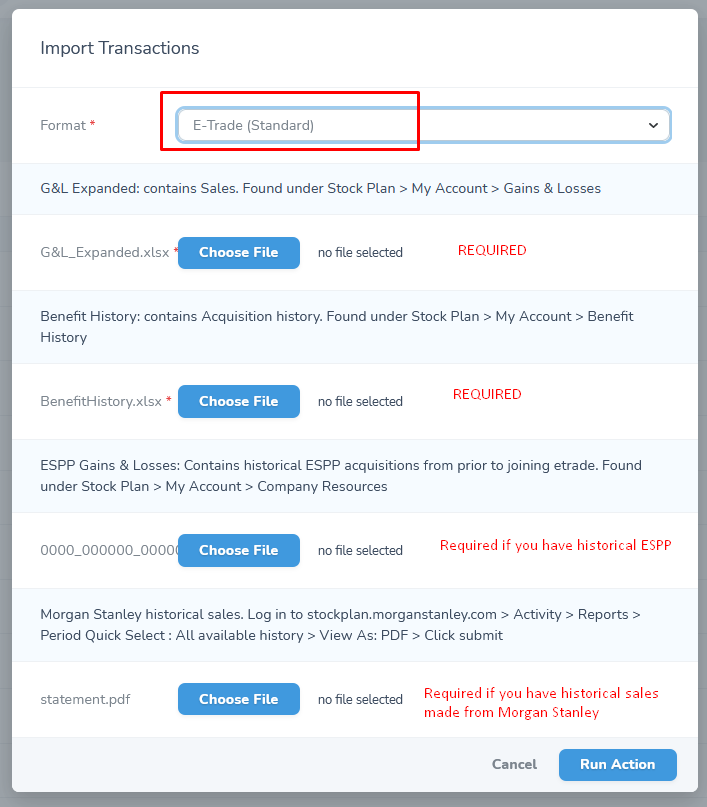
1. G&L_Expanded.xlsx (Sales Made on E-Trade)
- Go to My Account > Gains & Losses
- Tax Year: click "custom date" and choose any time prior to move to e-trade
- Click Download > Download Expanded
2. BenefitHistory.xlsx (Shares Received)
- Go to My Account > Benefit History
- Click Download > Download Expanded
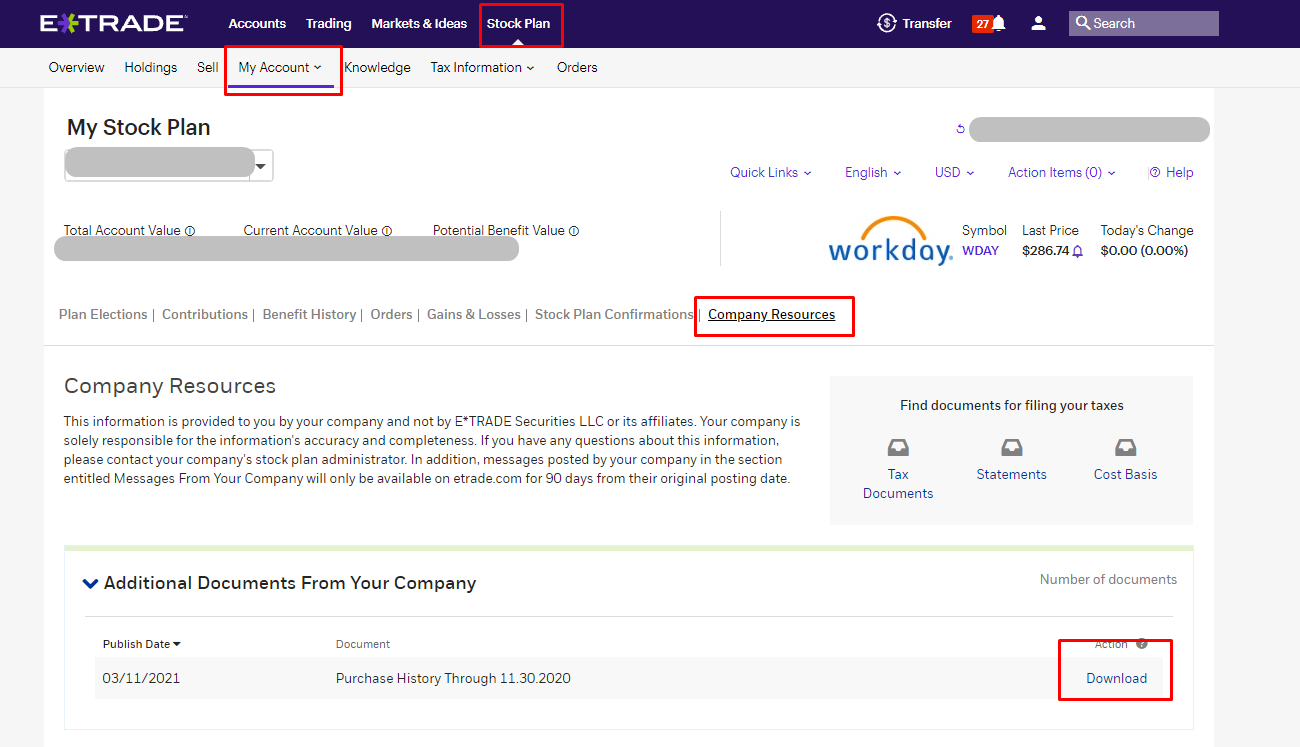
3. Historical ESPP Acquisitions (PDF)
Download files with names like 7111_2111_2111_1111.pdf
- Go to My Account > Company Resources
- Download file under "additional documents from your company"
Getting Your Files from Morgan Stanley
Access Reports
Navigate to stockplan.morganstanley.com > Activity > Reports
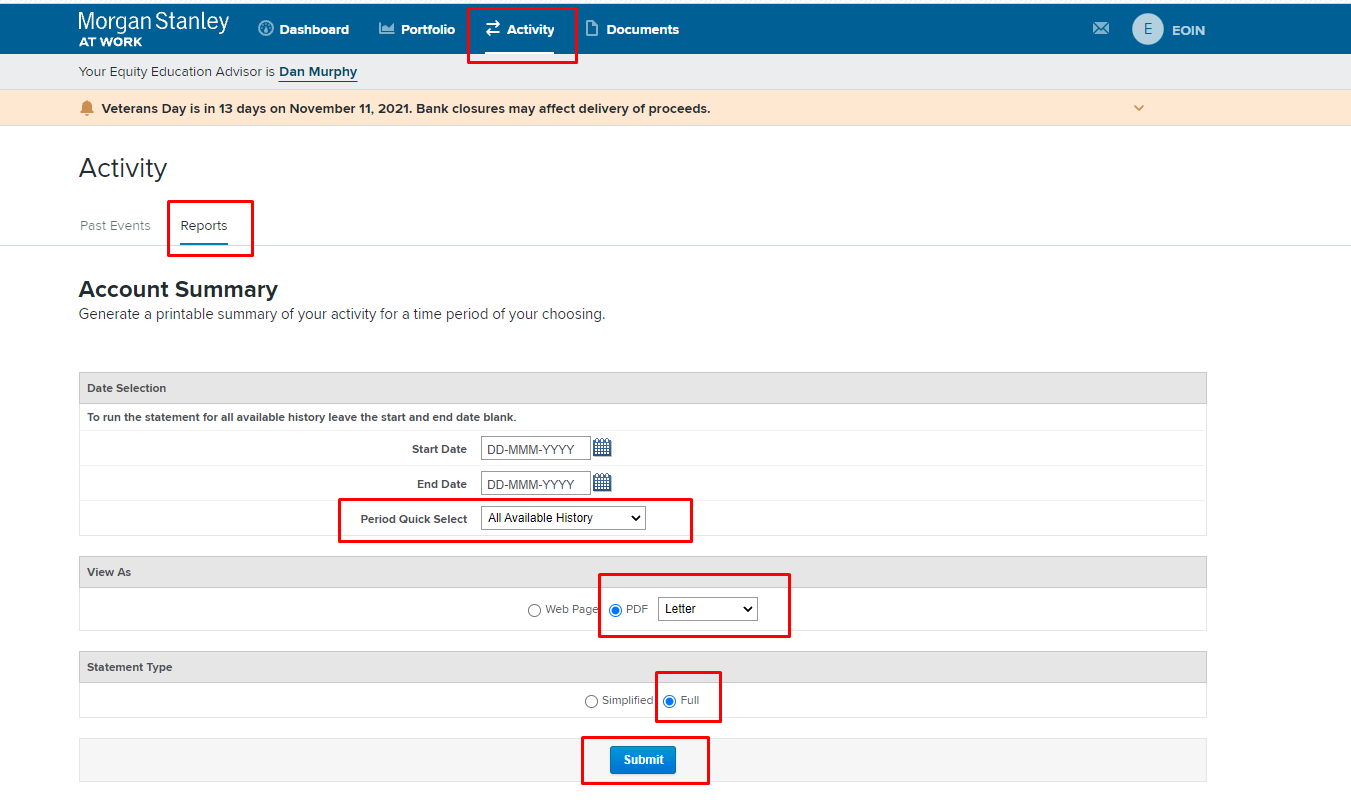
- For "Period Quick Select": "All Available History"
- For "View As": "PDF"
- Click Submit
- Filename will be "statement.pdf" and will contain sales made prior to move to e-trade
Import Your Files into simplecgt
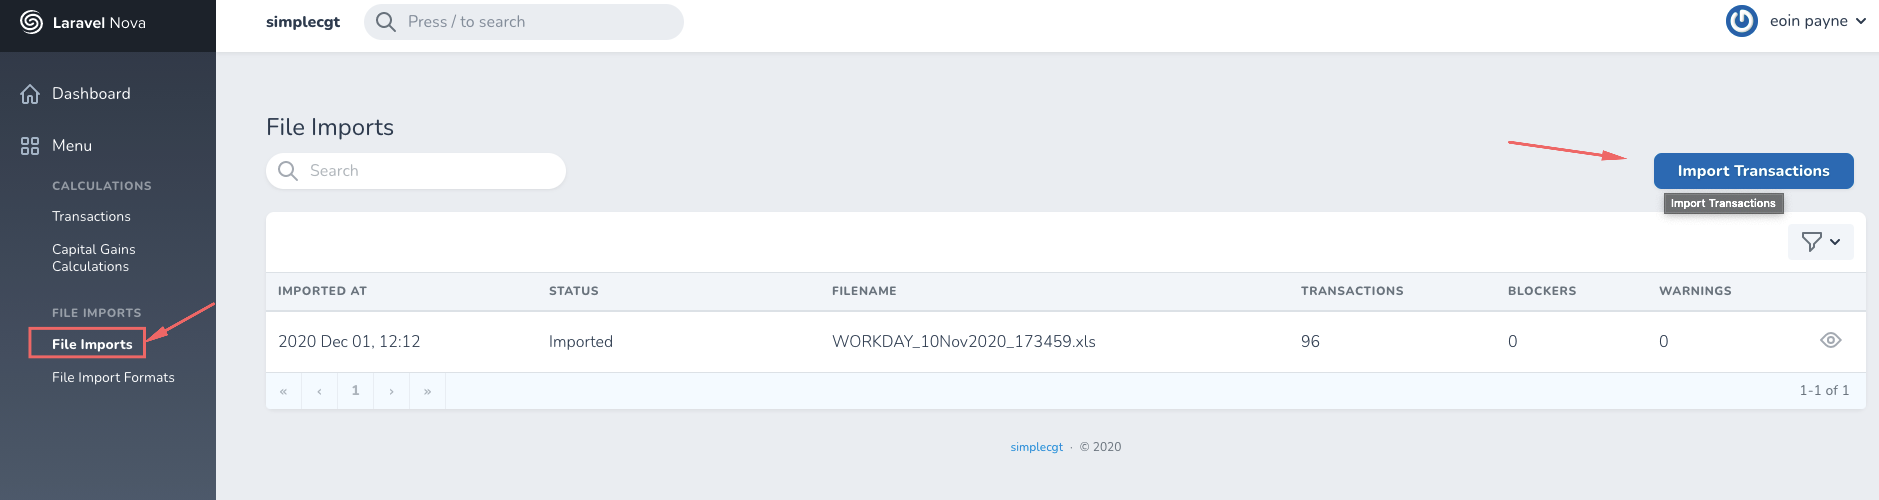
Step 1: Access File Imports
Go to the "File Imports" page and click "Import Transaction".
Step 2: Import Your Files
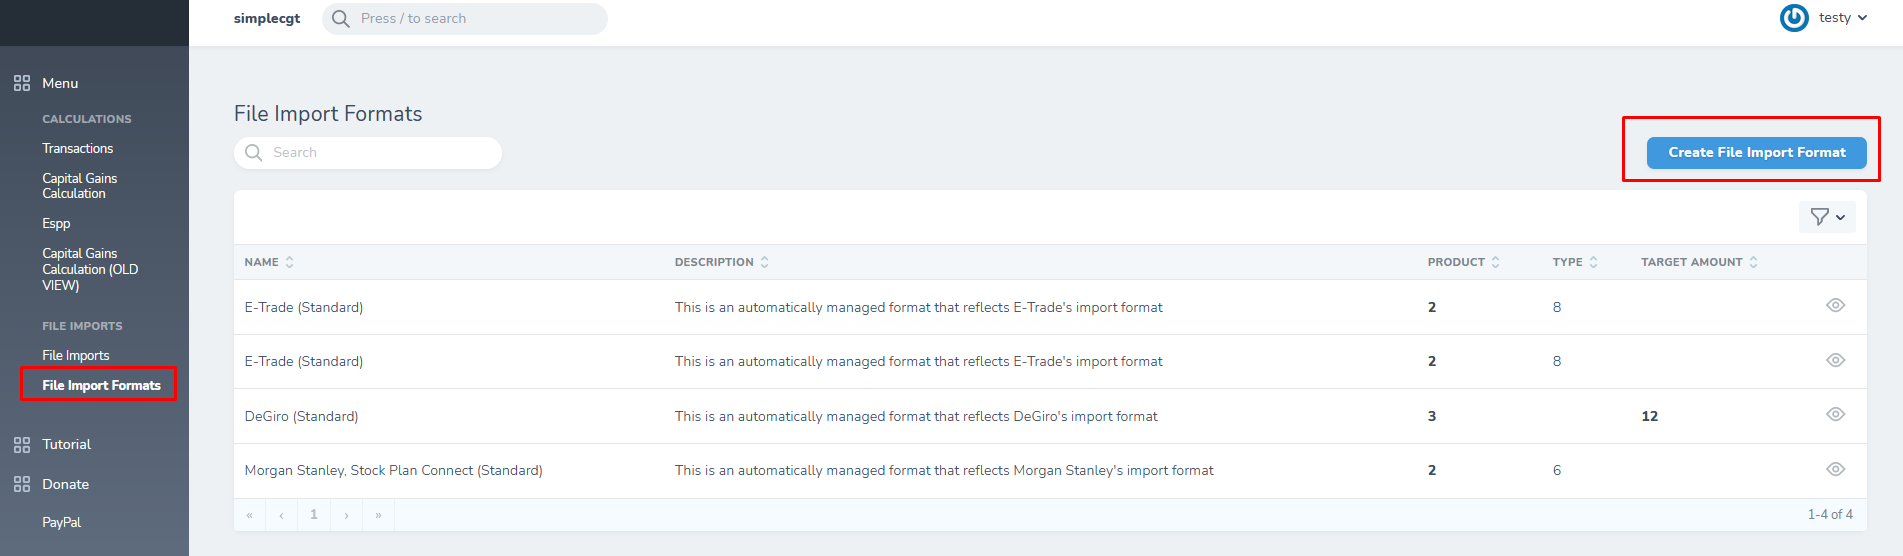
Supported Formats: You can also import Degiro files, or create a custom import for almost any spreadsheet export under the File Import Formats section. Contact us if you'd like us to add support for more files.
Step 3a: Review Draft Transactions
Review the Draft Transactions. When happy to proceed, select "Import Draft Transactions" and click the blue arrow.
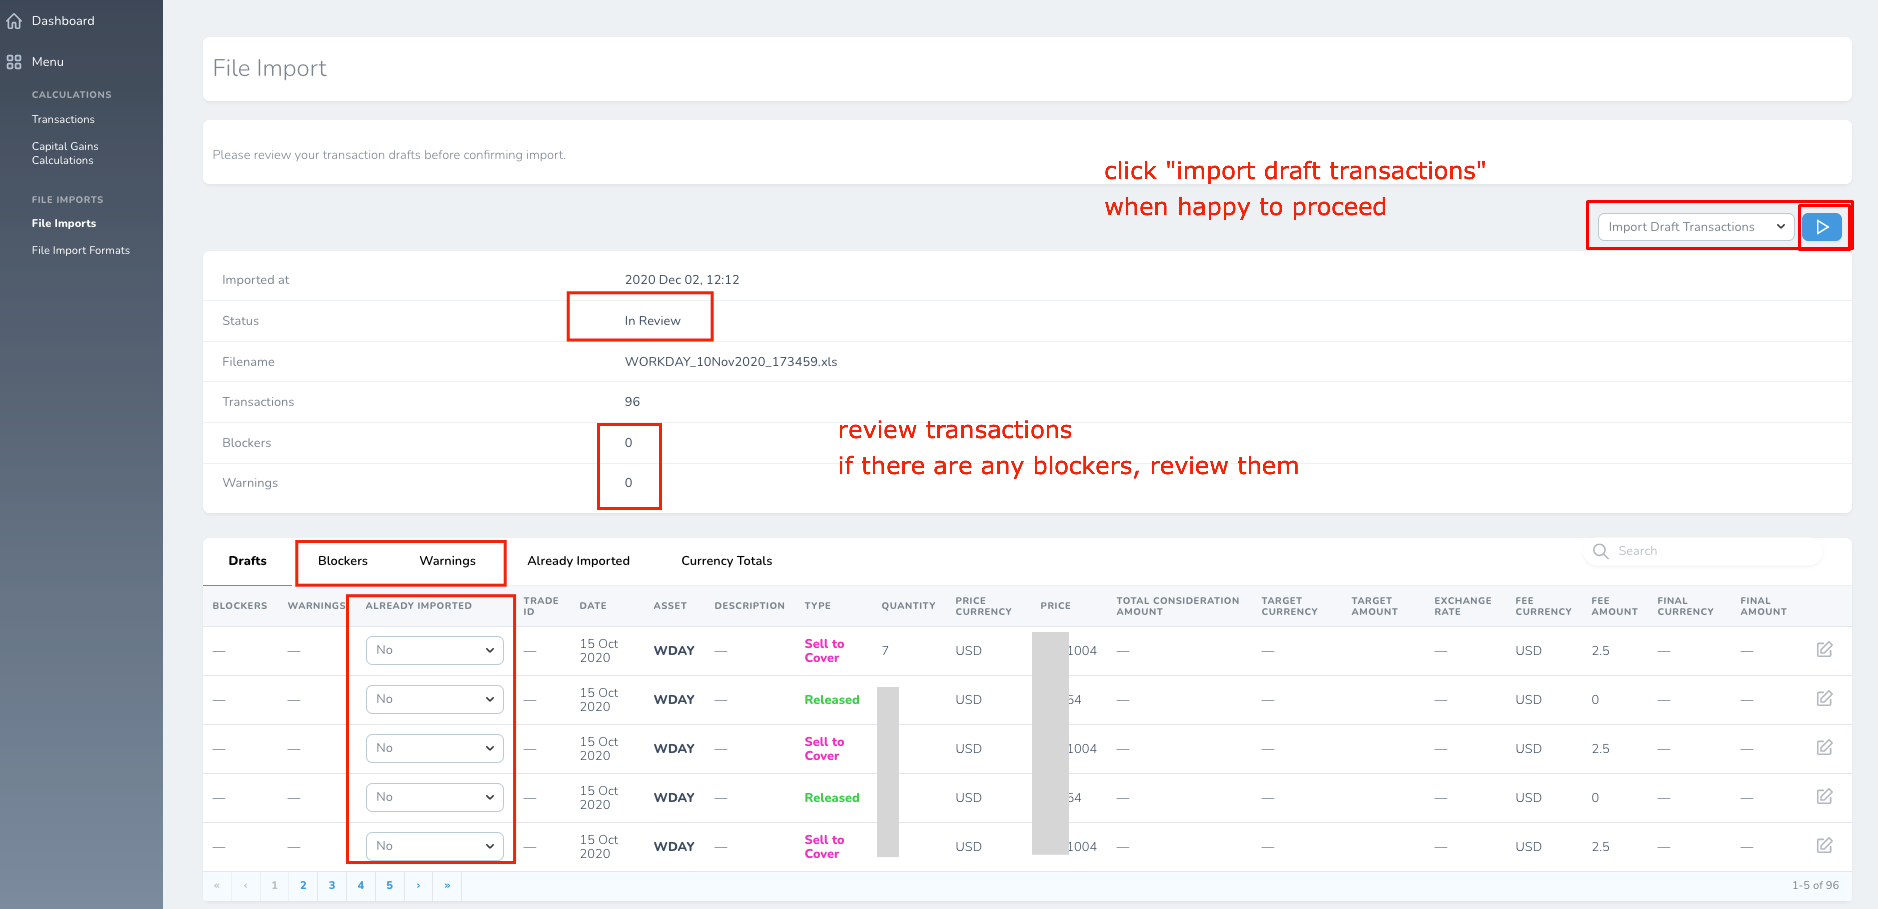
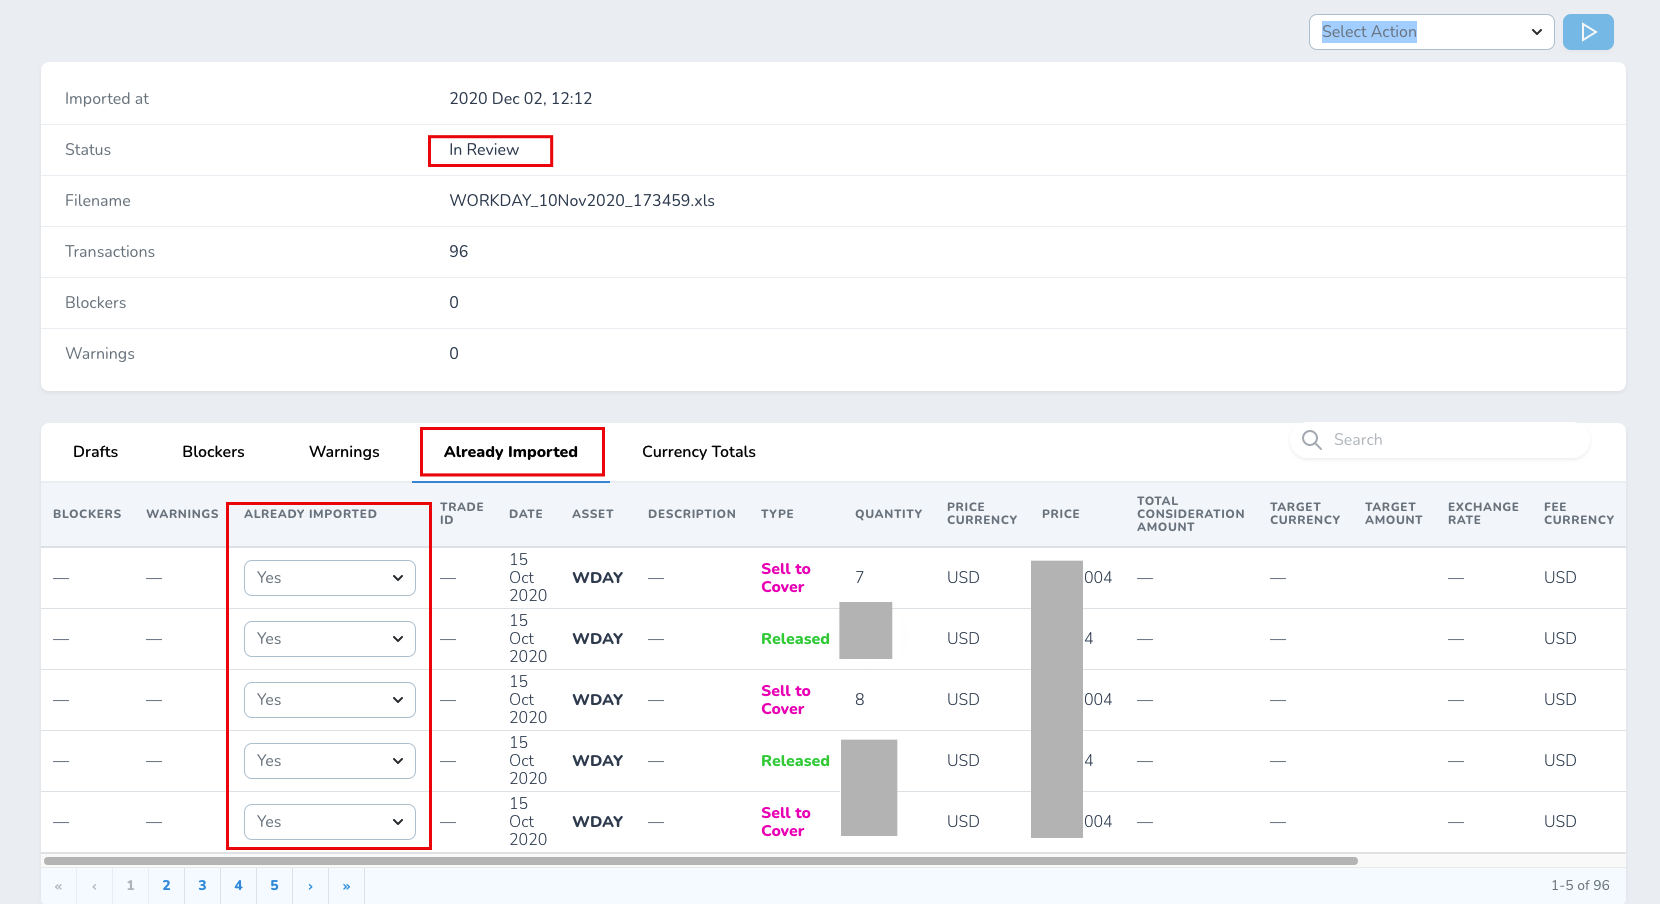
Step 3b: Already Imported Files
Smart Import: If you export a new file in 6 months, we will recognize transactions "already imported" and by default, only import the new Transactions. This is your chance to review and ensure you are happy.
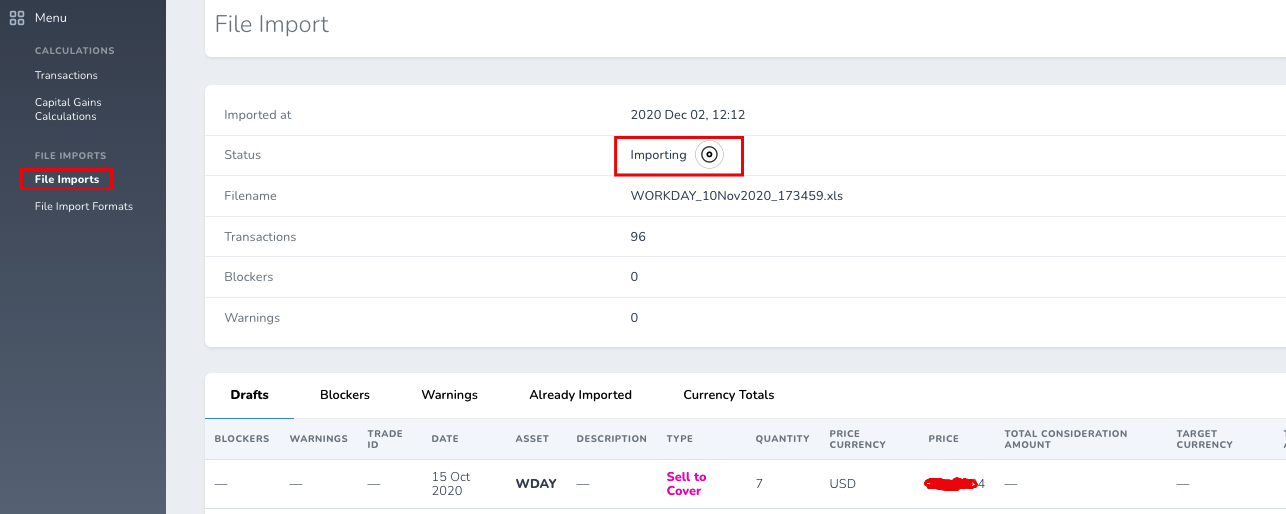
Step 4: Import Status
Once you've clicked "Import Draft Transactions", the status will be in "importing". Once finished, status will change to "imported" and a link to the imported transactions will appear. Clicking this link is the same as clicking "Transactions" tab on the left.
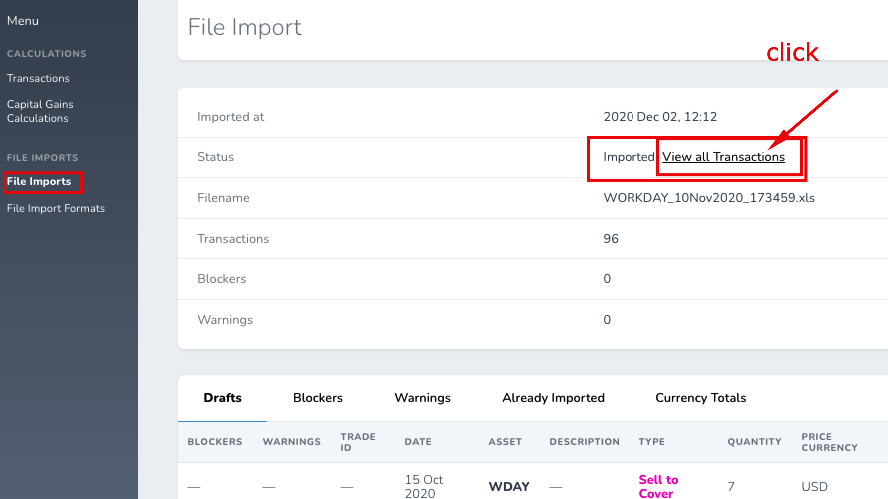
Step 5: Managing Import History
If you closed the window by mistake before importing, or just want to see which files you have already imported, you can click "File Imports". If still "in review" you can click the eye symbol to view and carry on.

Review and Calculate Your Tax
Step 6: Review Imported Transactions
Review your imported Transactions. These will be used to calculate your Tax Liability. You can view these transactions in greater detail and edit them to adjust values (e.g., additional fees incurred outside of your broker like bank charges or losses on currency exchange etc).

Step 7: Run Capital Gains Calculation
Once happy with your transactions, click "Run Capital Gains Calculation" to calculate your tax for all years imported.

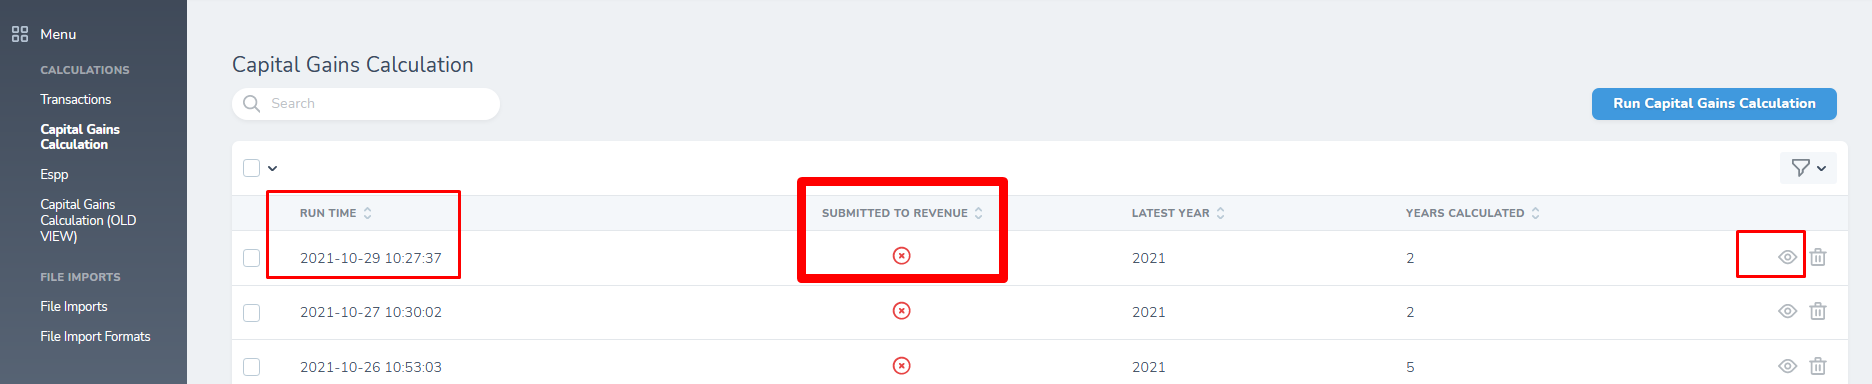
Step 8a: Select Calculation Results
Important: Mark your calculation run as submitted to revenue once you are happy with it! This allows us to alert you to any corrections required in the future.
Select the latest calculation results or view past calculations.
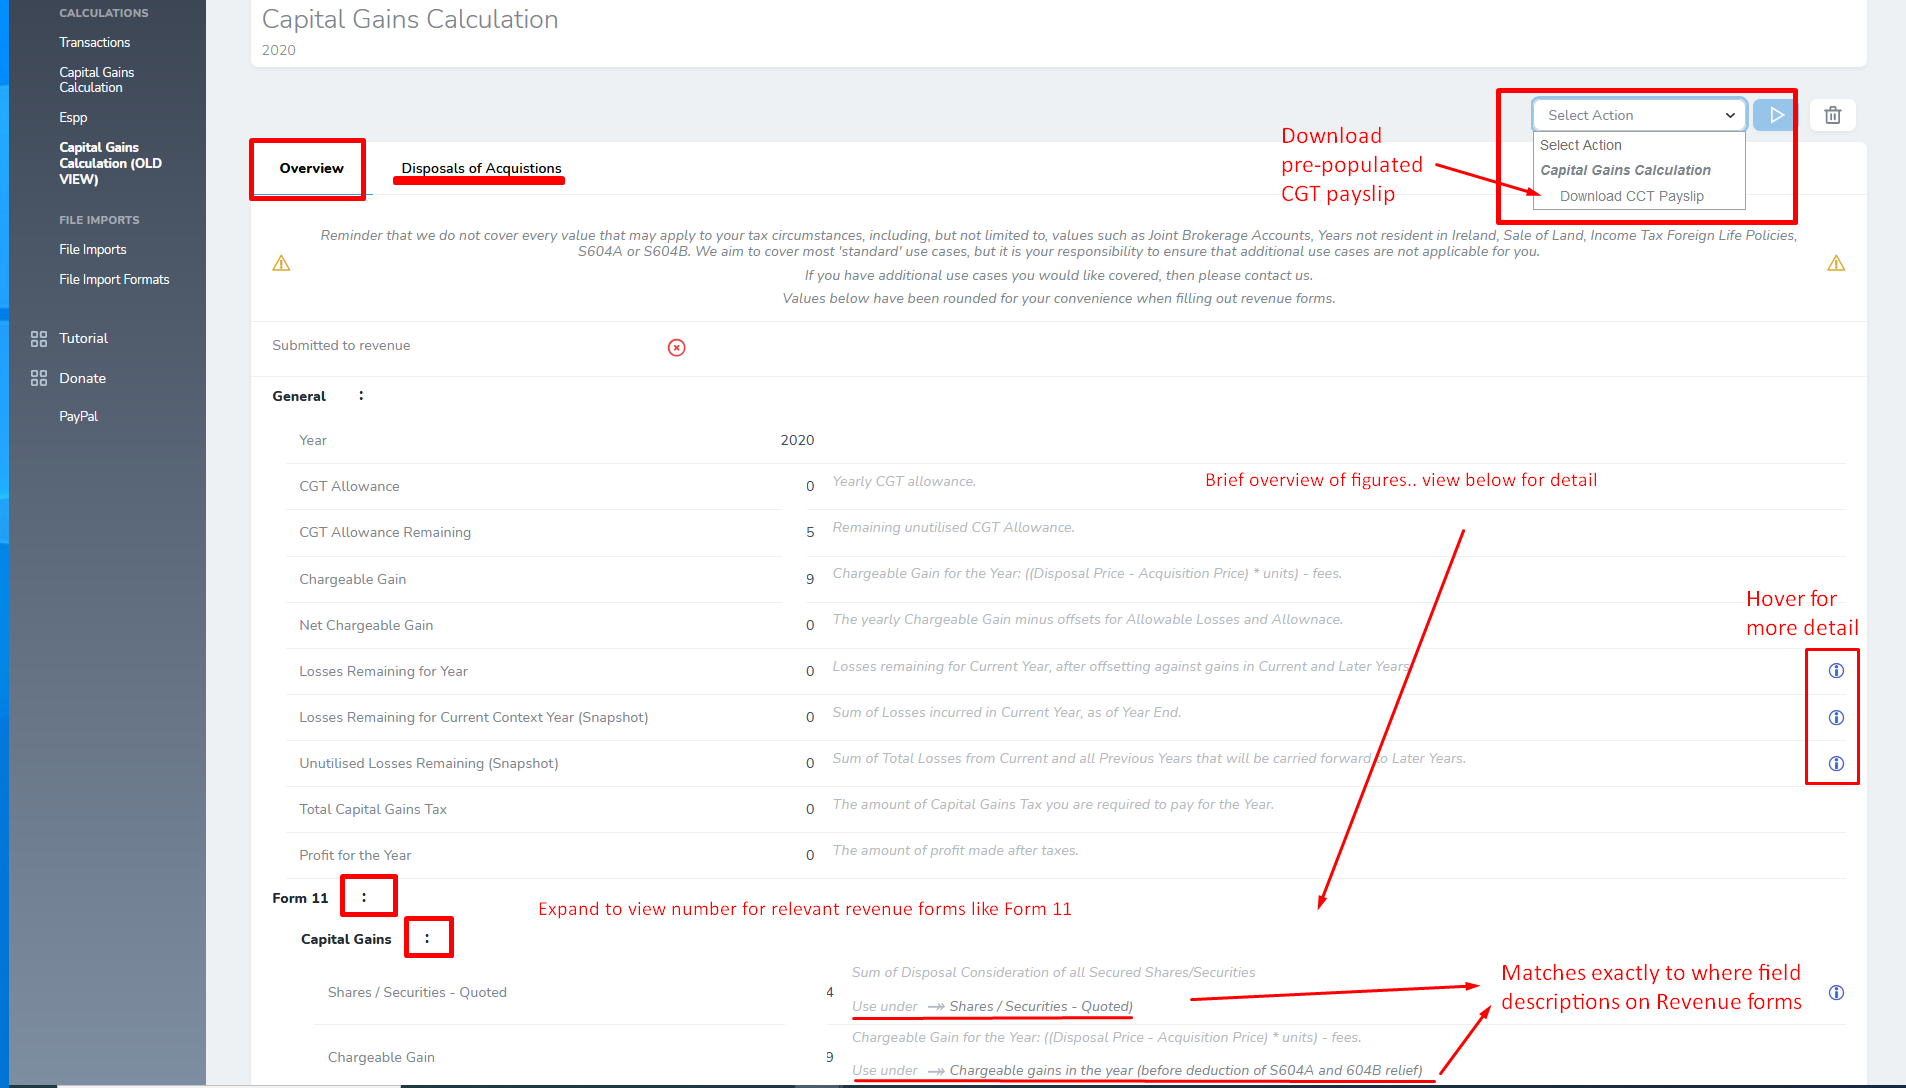
Step 8b: View Calculation Results
View Calculation Run results, dig deeper on each year and mark calc run as submitted to revenue.

Step 8c: Detailed Breakdown
By clicking into the year, you will see descriptions for each number. Expand relevant sections to see relevant numbers to be used in Form 11 and CGT.
Step 8d: Identifiable Breakdown
You can then see a breakdown of all of the "identifiables" that were created to calculate your tax correctly.
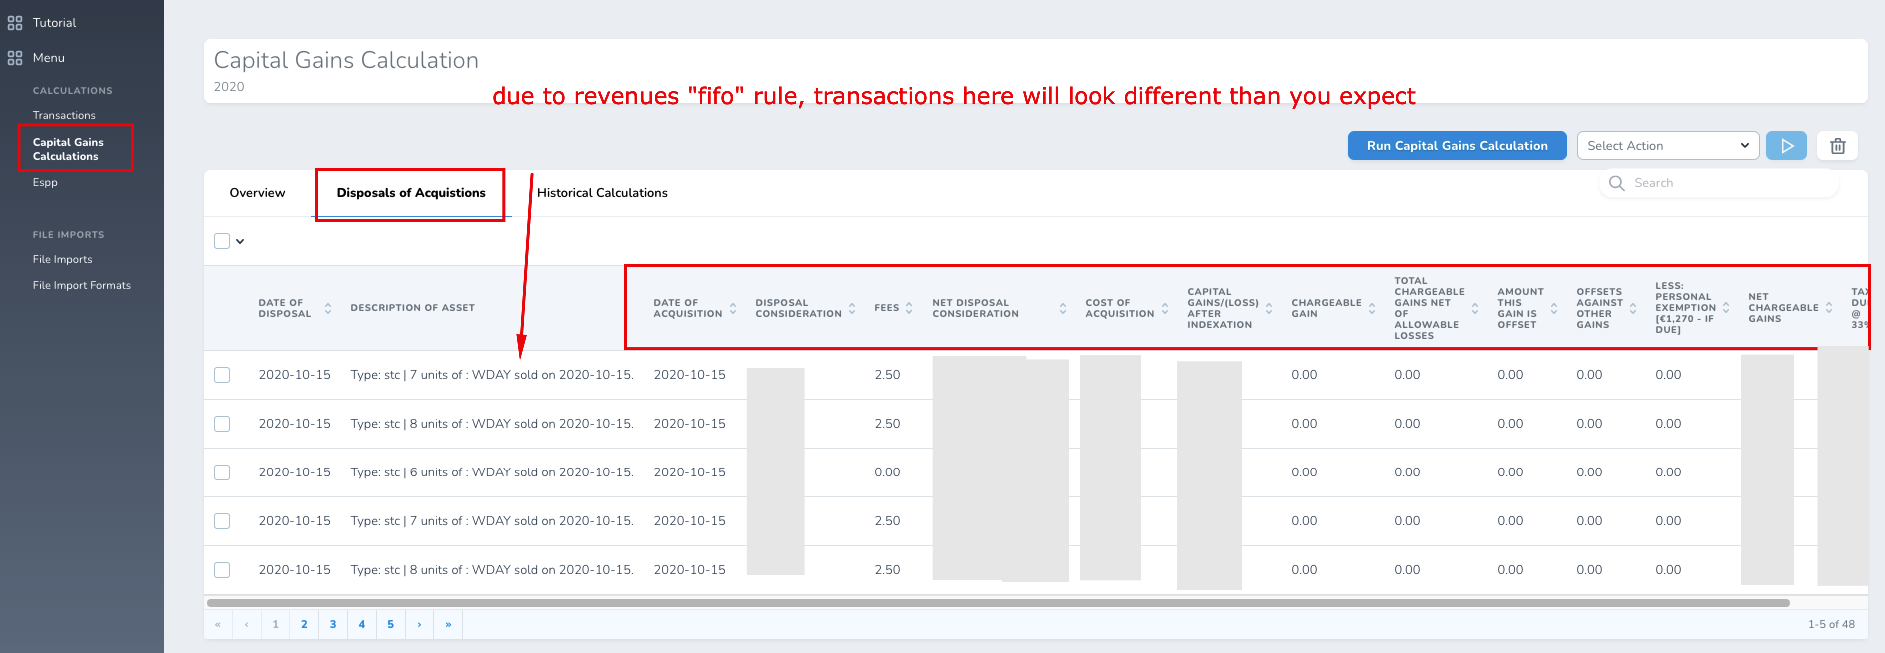
Note: These will differ from Morgan Stanley as Revenue require identification of sales to acquisitions on a First In First Out basis.
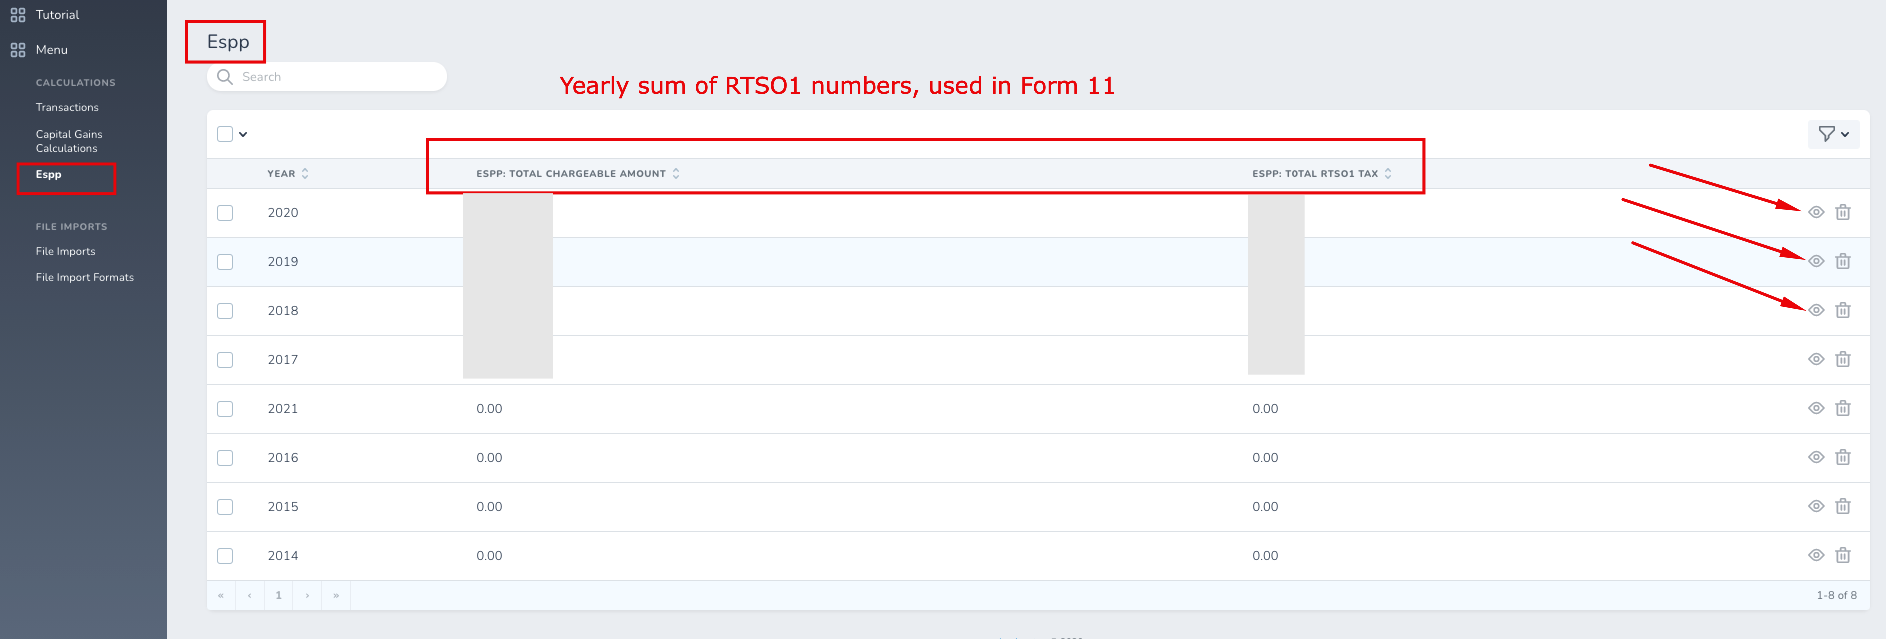
Step 9a: ESPP Overview
Your imported ESPP deposits are also automatically handled. Here you will see your yearly summation, used in Form 11.
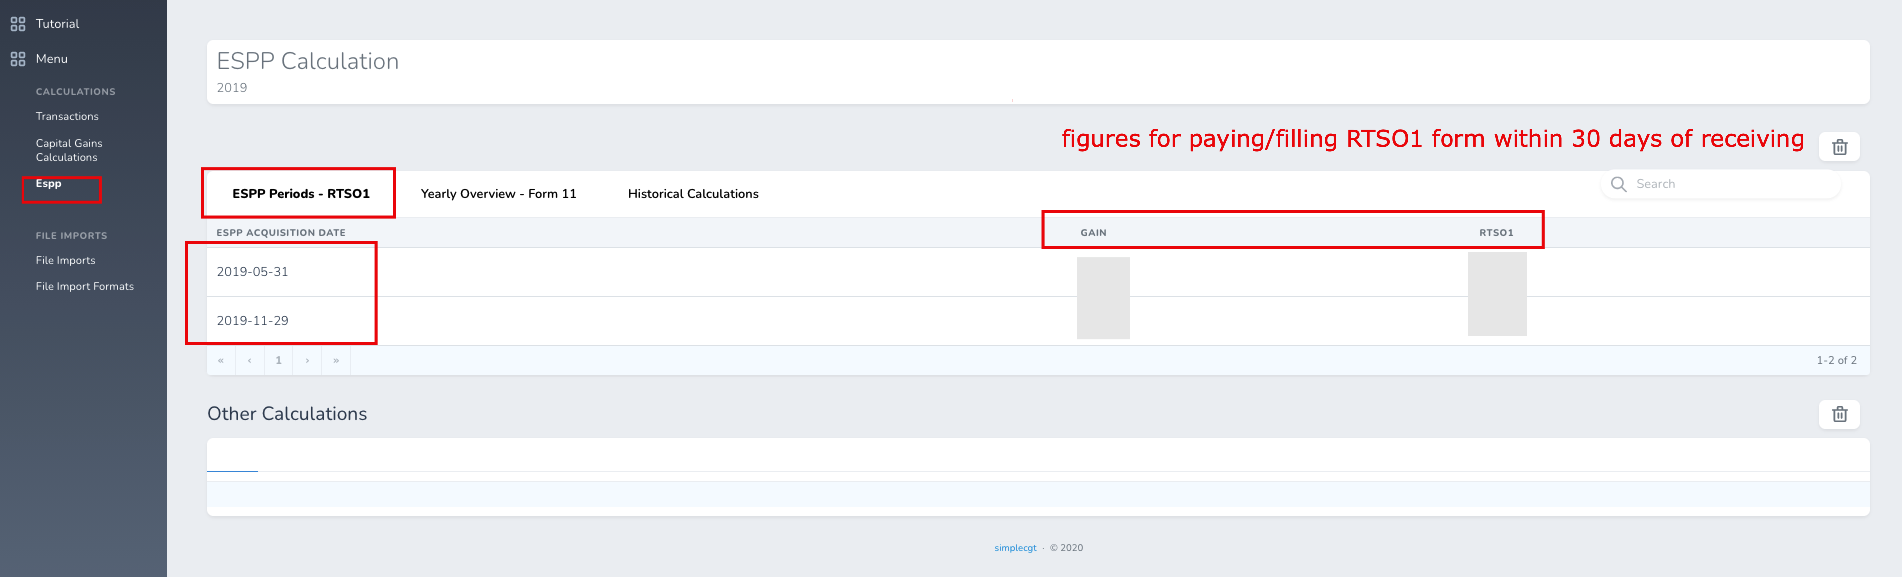
Step 9b: ESPP Period Details
Click into the relevant year to see the figures for each ESPP period.
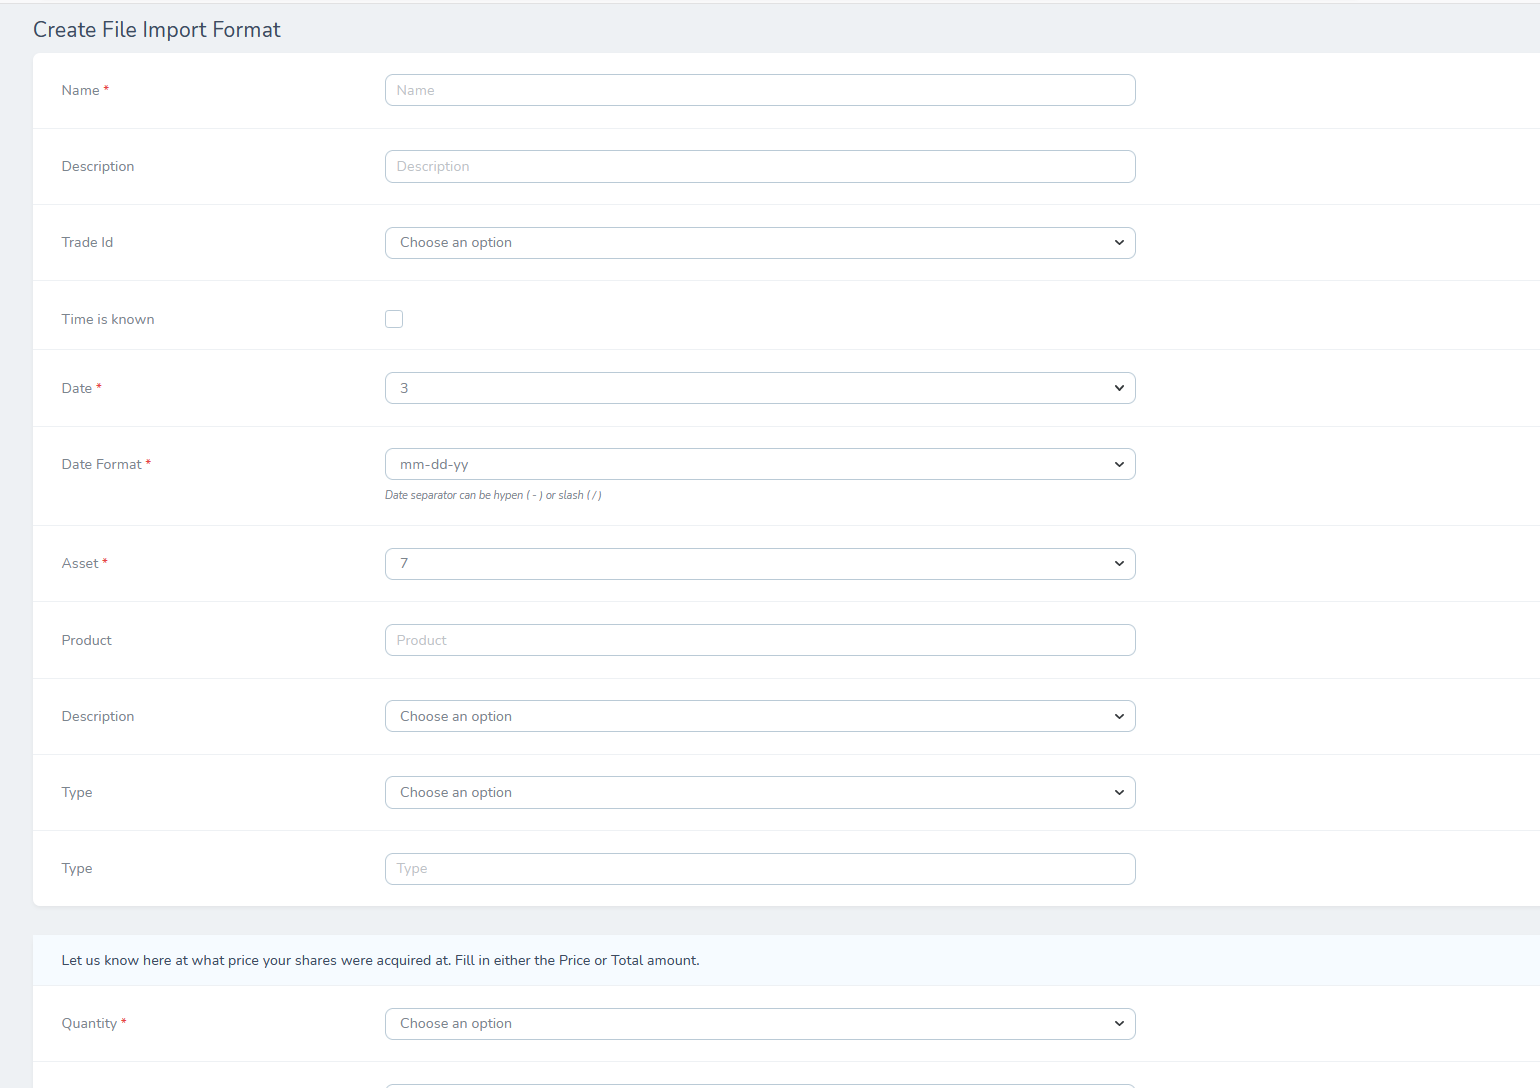
Custom Import Formats
Custom Imports: You can create a custom import for whatever spreadsheet format you have under "File Import Formats". This is done by matching the required fields with your relevant spreadsheet column numbers.